




Ninja Forms
Your WordPress forms are already collecting leads. Now send them somewhere useful. Connect Ninja Forms to Positive User through Zapier and turn every form submission into a contact profile with the data your marketing team needs. The moment a visitor fills out your form, their name, email, and every other field flow into Positive User, ready to trigger automations and follow-ups.
Every Form Submission, Instantly in Your CRM

Create Contacts From Any Ninja Forms Submission
Contact forms, lead capture forms, quote requests, event registrations, survey responses. Whatever you build in Ninja Forms, every submission fires an instant webhook to Zapier and creates or updates a contact in Positive User. The form fields map directly to contact attributes: name, email, phone, company, and any custom question you’ve included.
Trigger Automations the Moment Someone Submits
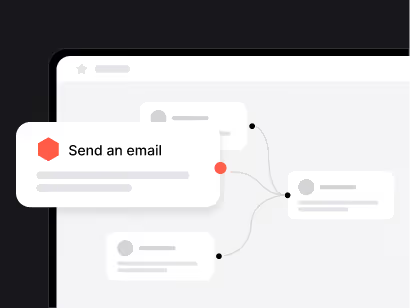
The webhook fires instantly, not on a polling schedule. By the time your visitor sees the confirmation message, Positive User already has their profile. Use the submission to trigger a welcome email, assign a tag based on the form topic, create a deal in your pipeline, or alert your sales team. One form submission can kick off an entire sequence.

All Your Forms, One Destination
Ninja Forms lets you build unlimited forms, and each one can have its own Zapier webhook. A contact form on your homepage pushes leads to one segment. A demo request form on your pricing page creates a high-intent deal. A feedback survey on your blog tags respondents by topic. Different forms feed different workflows, all landing in the same Positive User database.
Three simple steps to get started
Install the Ninja Forms Zapier Add-On
In your WordPress dashboard, install and activate the Ninja Forms Zapier add-on. It is included with a Ninja Forms membership or available as a standalone purchase.
Create the Zap and Paste the Webhook
In Zapier, create a new Zap with Ninja Forms as the trigger and "User.com" as the action. Select "New Form Submission." Zapier generates a webhook URL. Copy it. In your Ninja Forms editor, go to Emails & Actions, add a Zapier action, and paste the webhook URL. Save and publish.
Test and Activate
Submit a test entry from the form preview. Zapier receives the data and lets you map each field to the corresponding Positive User attribute. Turn on the Zap.

Popular implementation guides
- How to Integrate With Zapier: Complete Zapier connection walkthrough. Read Guide →
- Ninja Forms + Positive User on Zapier: Browse workflow templates on Zapier. View on Zapier →
- Ninja Forms Zapier Add-On Documentation: Setup guide from Ninja Forms covering add-on installation and webhook configuration. Read Guide →
- Automation Workflows: Set up automations that fire on new form contacts. View Tutorial →
- Attributes: Map Ninja Forms fields to the right Positive User attributes. View Tutorial →
- What Are Events: Use form submissions as custom events for segmentation. View Tutorial →
Frequently Asked Questions
Do I need coding skills?
No. You install a WordPress add-on, paste a webhook URL into the form editor, and map fields in Zapier. No code.
Do I need the Ninja Forms Zapier add-on?
Yes. The Zapier add-on adds webhook functionality to Ninja Forms. It is included with any membership plan or available as a standalone purchase. The core plugin alone cannot connect to Zapier.
How does this compare to Contact Form 7?
The Contact Form 7 integration uses a dedicated WordPress plugin that sends data directly to Positive User without Zapier. The Ninja Forms integration goes through Zapier via webhook, giving you more flexibility (multi-step workflows, conditional logic, routing to multiple apps) but requiring a Zapier account. Choose based on which form plugin you use and whether you need Zapier’s capabilities.
Can I use Ninja Forms alongside the Positive User WordPress plugin?
Yes. The Positive User WordPress plugin handles visitor tracking, chat widget, and WooCommerce integration. Ninja Forms via Zapier handles form submission routing. They run independently and complement each other.
What if someone submits with an existing email?
The "Create/Update User" action matches on email address. If a contact with that email already exists, it is updated with the new form data instead of creating a duplicate.
Is the data GDPR-compliant?
Ninja Forms, Zapier, and Positive User all offer GDPR compliance tools. Ninja Forms supports consent fields and data export/deletion requests. Make sure your forms include appropriate consent language. Zapier is SOC 2 compliant.